
This is the final result of this part of the tutorial:

So let's get started! Begin by clicking the big Lighting button in the toolbar at the top.

We'll first put our sun into a better position. The only 2 settings we'll be using on our sun are the Heading and Elevation. Adjusting the heading will basically rotate the sun around the camera, and the elevation will determine how high the sun is, to give a sunset/sunrise feel to it. Let's tweak those until we get the results we want. When you're rotating the sun, you'll notice a little white cross come into view. This resembles the sun, and I'll use it as a guideline to positioning my sun where I want it to be.

After I adjusted those settings, here's what I came up with:

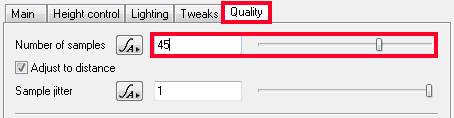
Well, that pretty much sums up the lighting part! Now let's move on to some of the atmosphere settings. First off, you'll notice that if you render (I'm not going to, for time's sake) there's some really ugly noise all over the darker parts of your image. To fix this, first go to the Atmosphere tab in the toolbar, then go to the Quality tab in the Properties panel, and finally raise the Number of Samples value. I'll keep mine at about 45 for now, but typically I won't render a final image unless the atmospheric samples are at least 55 (64 is the maximum).
There are two more things I want to do with the atmosphere settings; first, go back to the Main tab and increase the redsky decay to 3 or 4 (unless your scene isn't a sunrise/sunset). this will add a little more red to the sky, and make it much more believable.

Now for the other thing: Clouds! You can't have a perfectly clear sky (well, you can, but not often :P), so let's add a few clouds in there to make the image much more interesting. Back up above the outline, click on Add Cloud Layer and select the 3D Volumetric option.

Begin by first changing the Edge Sharpness to 10, and the Cloud Density to 0.03.

Next, go to to the Density Fractal Shader by clicking on the + sign next to it, then choosing Go to Density Fractal.

On the new window that opens up, press the Random Seed button repeatedly until you're happy with the scattering of the clouds.

Now close out of that window, and under the Tweaks tab, enable Flatter Base and adjust the Base Wispiness and the Base Softness values to your taste.
Now let's add one more cloud layer; make this a high level cirrus. The only thing you need to do to this layer is to tweak the random seed again until you think it looks right.
That's it! I hope you enjoyed this part of the Terragen 2 series, and if you have any questions, comments, or problems related to this tutorial, please post them below or email me at ben.amend@gmail.com. Thanks for reading!
No comments:
Post a Comment