
Wednesday, September 29, 2010
Apologies
Sorry everyone, but the magnifying glass effect part 2 won't be coming out for a few more days. I hope I didn't disappoint anyone, and I'll try to get it posted as soon as possible.
Thursday, September 23, 2010
Notice
I will not be posting any of my artwork on the Home page of my blog anymore; I'll just be putting tutorials there (there will still be a separate page with links to all of the tutorials, however). If you want to see my artwork, go to one of the other pages on my blog; this means that if I have a new image I've just created, I will be putting it on it's respective page, and it will not show up on my home page. The pages won't be updated on a regular basis, but I should be adding new images to them monthly. Hope this makes sense!
Tuesday, September 21, 2010
Creating a Magnifying Glass Effect in Blender 2.5 - Part 1 (Modeling)
Hi, everyone! Sorry it took me so long to post this, but here it is. I will be using blender version 2.53 beta; I would use 2.54 beta, but it has a rather bad bug in it at the time, so I'll be using 2.53.
This is the final result of this tutorial:

Let's start by deleting the default cube (X) and adding a circle (Shift A - Mesh - Circle), then on the left, check the box next to 'Fill'. Go into top orthographic view (Numpad 7 - 5), and rotate the circle 90 degrees along the X axis (R - X - 90). Enter Edit Mode (Tab), extrude the circle along the Y axis (E - Y - 20) and scale it down (S - 0.75).

Tab back into Object Mode, and select 'Smooth' on the panel to the left. Not tab back into Edit Mode, select everything (Press A twice), and press Ctrl N to recalculate the normals. This will get rid of the strange lines on the mesh (which are only really noticeable in Object Mode).

For the area around the lens, I'm going to create it so that it's disconnected from the handle, but it appears to be attached. Make sure you're in Edit Mode, and add a circle (Shift A - Circle). Scale this circle up (S - 9) and move it along the Y axis so it's at the top of the handle (G - Y - 28).

Go into front view (Numpad 1) and move the circle up along the Z axis (G - Z - 1), then extrude it down (E - Z - -2). Select all of the vertices linked to this circle (Ctrl L), and go back to top view (Numpad 7). Now extrude this in (E - S - Shift Z - 0.9).

Now press Ctrl L again to select all of the vertices linked (or connected) to the ones you have selected, and on the left click on the 'Smooth' option in the 'Shading' tab. Now we'll have to recalculate the normals again, so with the area around the lens still selected, press Ctrl N. Now click on the 'Modifiers' button on the right, and select 'Subdivision Surface' from the drop down menu.

Set the View levels to 2, and enable 'Optimal Display'. You'll notice that the magnifying glass looks too rounded now, so we need to add more edge loops to sharpen the edges a little more. Start by tabbing back into Edit Mode, and adding an Edge Loop on the handle (it should first display as a purple line; make sure that this line is horizontal and not vertical). Do this by pressing Ctrl R, clicking, and moving the mouse to where you want the edge loop to go. To sharpen the top of the handle, move the edge loop towards the top, but not all the way to the top.

This is the example that I've used; you can also create vertical edge loops, but that wouldn't be a good idea for the handle. I'm not going to go through every edge loop; just remember to add an edge loop where you want an area to be sharper.

We'll be making the lens a separate object, so tab into Object Mode, and add a circle (You should now how to do this by now). Select 'Fill' on the panel to the left, and scale the circle up (S - 8.5). Now press G and move the circle so that it fits inside the lens area.

Now tab into Edit Mode, deselect everything (A), and select the middle vertex (Right Click). Go into front view, and move the vertex up to the height you want it to be (G - Z). Tab back into Object Mode, and select the 'Smooth' option again, and recalculate the normals (Ctrl N)(Be sure to tab back into Edit Mode before doing this). It's up to you if you want to put in more detail work, but I won't go into this for time's sake.

This is the final result of this tutorial:

Let's start by deleting the default cube (X) and adding a circle (Shift A - Mesh - Circle), then on the left, check the box next to 'Fill'. Go into top orthographic view (Numpad 7 - 5), and rotate the circle 90 degrees along the X axis (R - X - 90). Enter Edit Mode (Tab), extrude the circle along the Y axis (E - Y - 20) and scale it down (S - 0.75).

Tab back into Object Mode, and select 'Smooth' on the panel to the left. Not tab back into Edit Mode, select everything (Press A twice), and press Ctrl N to recalculate the normals. This will get rid of the strange lines on the mesh (which are only really noticeable in Object Mode).

For the area around the lens, I'm going to create it so that it's disconnected from the handle, but it appears to be attached. Make sure you're in Edit Mode, and add a circle (Shift A - Circle). Scale this circle up (S - 9) and move it along the Y axis so it's at the top of the handle (G - Y - 28).

Go into front view (Numpad 1) and move the circle up along the Z axis (G - Z - 1), then extrude it down (E - Z - -2). Select all of the vertices linked to this circle (Ctrl L), and go back to top view (Numpad 7). Now extrude this in (E - S - Shift Z - 0.9).

Now press Ctrl L again to select all of the vertices linked (or connected) to the ones you have selected, and on the left click on the 'Smooth' option in the 'Shading' tab. Now we'll have to recalculate the normals again, so with the area around the lens still selected, press Ctrl N. Now click on the 'Modifiers' button on the right, and select 'Subdivision Surface' from the drop down menu.
Set the View levels to 2, and enable 'Optimal Display'. You'll notice that the magnifying glass looks too rounded now, so we need to add more edge loops to sharpen the edges a little more. Start by tabbing back into Edit Mode, and adding an Edge Loop on the handle (it should first display as a purple line; make sure that this line is horizontal and not vertical). Do this by pressing Ctrl R, clicking, and moving the mouse to where you want the edge loop to go. To sharpen the top of the handle, move the edge loop towards the top, but not all the way to the top.
This is the example that I've used; you can also create vertical edge loops, but that wouldn't be a good idea for the handle. I'm not going to go through every edge loop; just remember to add an edge loop where you want an area to be sharper.

We'll be making the lens a separate object, so tab into Object Mode, and add a circle (You should now how to do this by now). Select 'Fill' on the panel to the left, and scale the circle up (S - 8.5). Now press G and move the circle so that it fits inside the lens area.

Now tab into Edit Mode, deselect everything (A), and select the middle vertex (Right Click). Go into front view, and move the vertex up to the height you want it to be (G - Z). Tab back into Object Mode, and select the 'Smooth' option again, and recalculate the normals (Ctrl N)(Be sure to tab back into Edit Mode before doing this). It's up to you if you want to put in more detail work, but I won't go into this for time's sake.

This concludes part 1 of the magnifying glass tutorial! Congratulations if you completed it, and I hope you finish the whole series once I've released them all. Again, sorry for the long wait, and if you have any questions, comments, or problems, post them in the comments below. Thanks for reading!
Friday, September 17, 2010
No Email Subscription
Sorry everyone, but I had to delete the email subscription box. It wasn't working right, so I took it off the site.
On another note, The magnifying glass tutorial part 1 should be coming out tomorrow. Sorry about the wait.
On another note, The magnifying glass tutorial part 1 should be coming out tomorrow. Sorry about the wait.
Tuesday, September 14, 2010
New Blog Feature
Hello, everyone! As you've probably noticed, I've added another little gadget on the side. You can now enter your email address and receive an email for every new post I add. I haven't done this before, so be sure to tell me if it works or not in the comments below. Hope you subscribe, as that would be greatly appreciated. Thanks!
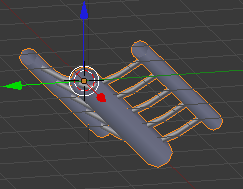
Next Tutorial
Here's a quick preview of the next tutorial series I'll be creating. This will probably be coming out tomorrow; if not, then sometime this week.
Sunday, September 12, 2010
Mastering Blender (Quick Book Review)
Hi, everyone! This is a quick review of a book I got a while ago; I will probably be doing more of these in the future, though I'm not sure how many more I'll be writing. This review will be on the book Mastering Blender by Tony Mullen.
Mastering Blender has helped me to learn a lot more about blender; and even though it's written for version 2.48, it has been a great help in the past few months. It includes a CD with various .blend files to accompany the chapters (it also has blender 2.48 for Windows and Mac), and several full color pages to give the readers a better understanding of the overall book.
It is a 425 page paperback book, with very clear instructions. Although the binding on the full color pages isn't the greatest, those are quite useful as well.
This book definitely covers the basics very well, but it also has some more advanced techniques, including sections on how to use Python, the scripting language compatible with Blender. I also got most of my knowledge of the game engine from Mastering Blender.
It also covers how to get a good green screen effect, goes over the sculpting system, character rigging, character animation, UV mapping, etc.
In other words, I think it's a great book, and I'd give it 4 1/2 out of 5 stars. You can buy the book on Amazon, too. Thanks for reading!
Creating a 3D Anaglyph in GIMP
Hello, everyone! This is my first tutorial in a program that's not blender; I am using a program called GIMP. GIMP (GNU Image Manipulation Program) is free image editing/creating software that can be downloaded here: http://www.gimp.org/
In this tutorial, I will be running two different images through GIMP to form a 3D anaglyph. I took these photos with my camera; of course, you can do the same in blender, or any other 3d software as well. The goal is to take a picture of your subject, then move the camera over to the right a little bit and take the photo again. Keep in mind that this is the traditional red & blue 3D, as I do not have all of the equipment to produce a new 3D image; since this is the red and blue kind, you will also lose any color you had in the image. Just a heads up before starting this tutorial.


Start by opening up GIMP, and opening the second of the two images you took. Next, select 'Open as Layers' and choose the first of your two photos. On the right, there should be a Layers box; select the first layer, then at the top, under Colors, select the Colorify option and click on the red colored box. Next click on your other layer and do the same, but this time choose the light blue colored box. Now select your first layer again by clicking on it, and lower the opacity to about 50

If you get your 3D glasses on now, the image should be 3D.

In this tutorial, I will be running two different images through GIMP to form a 3D anaglyph. I took these photos with my camera; of course, you can do the same in blender, or any other 3d software as well. The goal is to take a picture of your subject, then move the camera over to the right a little bit and take the photo again. Keep in mind that this is the traditional red & blue 3D, as I do not have all of the equipment to produce a new 3D image; since this is the red and blue kind, you will also lose any color you had in the image. Just a heads up before starting this tutorial.


Start by opening up GIMP, and opening the second of the two images you took. Next, select 'Open as Layers' and choose the first of your two photos. On the right, there should be a Layers box; select the first layer, then at the top, under Colors, select the Colorify option and click on the red colored box. Next click on your other layer and do the same, but this time choose the light blue colored box. Now select your first layer again by clicking on it, and lower the opacity to about 50
If you get your 3D glasses on now, the image should be 3D.

Friday, September 10, 2010
Creating a Roller Coaster in Blender 2.5 - Part 3 (Animating the Camera)
Hello, everyone! This is the 3rd and final part of my roller coaster tutorial series; you can find the previous parts here:
Part 1: http://ssimpossible.blogspot.com/2010/09/creating-roller-coaster-in-blender-25.html
Part 2: http://ssimpossible.blogspot.com/2010/09/creating-roller-coaster-in-blender-25_08.html
*NOTICE* This tutorial will not work in 2.55 beta, as there is a bug where the camera won't move when using the Follow Curve constraint. You will need to either download blender 2.54 beta, 2.53 beta, or download a patch for this bug, which I can't currently find, but I've seen it somewhere before. Sorry about this, and I suspect this will be fixed in 2.56
In this tutorial I will be teaching you how to animate a camera on the tracks. Let's start by first deleting the camera (X). Now select your curve (Right-Click) and center the cursor on the starting point of the curve (Shift S - Cursor to Selected), then add a camera (Shift A - Camera). Now click on the Constraints button:

And add a 'Follow Path' constraint. Click on the orange cube in the new panel that just appeared, and select the name of your curve. Next, select the 'Follow Curve' option, then rotate the camera 280 degrees along the Y axis (R - Y - 280), and move the camera up the Z axis (G - Z - 0.3). If you go into camera view now (0), and press Alt A, you should move along the roller coaster track as if you were actually in the roller coaster. There are probably some rotation problems, like riding along the side of the track as shown below:

But at the time I'm not sure how to fix this; sorry if this disappoints you, and in the mean time I'll try to figure out how to solve this problem.
As far as the actual ride goes, you'll probably realize you're moving extremely fast (though this will depend on the size of your roller coaster). Select your Curve, and click on the Object Data button.

Under the panel named 'Path Animation', change the number from 100 to whatever number you want. The higher the number, the slower the roller coaster will go. Whatever number you change it to, you have to do the same to the number underneath the timeline at the bottom.

As shown above, I've changed mine to 500.
You may have noticed that the camera is moving at a constant speed; real roller coaster cars don't do that, so we'll take a look at how to change that.
Start by going to frame number 0. The frame number is to the right of the End frame as shown in the image above. Next (making sure you have your curve selected) move your mouse over the option that says 'Evaluation Time', and press I on your keyboard. If you did it correctly, the box should now have turned yellow.

Now go to the frame where you want there to be a change in speed. In my case, it's frame number 30, where I want there to be a slight drop in speed as the camera is moving up. Type in that frame number, then type in the same number in the evaluation time box and press I again. For time's sake, I'm only going to do these frames, since I'm only giving a demonstration. Now split the window by clicking and dragging to the left the button shown below:

Change the window type to the Graph Editor by clicking the gray cube in the lower left corner of the new window, and selecting the option from the menu. You should see something like this in the center (you'll probably need to zoom out some to see all of it):

This is an animation curve; we can control the speed of the camera by editing it. Select the top orange handle by right clicking it, move it over to the right some (G - X), and that slows down the camera! The farther to the right you move the curve, the slower it gets, and the farther left, the faster it gets.
That's all for this tutorial; congrats on completing it! If you have any questions, comments, or problems, post them in the comments below. Thanks for reading, and as soon as I figure out how to solve the rotation problem, I'll make a post about it.
Part 1: http://ssimpossible.blogspot.com/2010/09/creating-roller-coaster-in-blender-25.html
Part 2: http://ssimpossible.blogspot.com/2010/09/creating-roller-coaster-in-blender-25_08.html
*NOTICE* This tutorial will not work in 2.55 beta, as there is a bug where the camera won't move when using the Follow Curve constraint. You will need to either download blender 2.54 beta, 2.53 beta, or download a patch for this bug, which I can't currently find, but I've seen it somewhere before. Sorry about this, and I suspect this will be fixed in 2.56
In this tutorial I will be teaching you how to animate a camera on the tracks. Let's start by first deleting the camera (X). Now select your curve (Right-Click) and center the cursor on the starting point of the curve (Shift S - Cursor to Selected), then add a camera (Shift A - Camera). Now click on the Constraints button:
And add a 'Follow Path' constraint. Click on the orange cube in the new panel that just appeared, and select the name of your curve. Next, select the 'Follow Curve' option, then rotate the camera 280 degrees along the Y axis (R - Y - 280), and move the camera up the Z axis (G - Z - 0.3). If you go into camera view now (0), and press Alt A, you should move along the roller coaster track as if you were actually in the roller coaster. There are probably some rotation problems, like riding along the side of the track as shown below:

But at the time I'm not sure how to fix this; sorry if this disappoints you, and in the mean time I'll try to figure out how to solve this problem.
As far as the actual ride goes, you'll probably realize you're moving extremely fast (though this will depend on the size of your roller coaster). Select your Curve, and click on the Object Data button.
Under the panel named 'Path Animation', change the number from 100 to whatever number you want. The higher the number, the slower the roller coaster will go. Whatever number you change it to, you have to do the same to the number underneath the timeline at the bottom.
As shown above, I've changed mine to 500.
You may have noticed that the camera is moving at a constant speed; real roller coaster cars don't do that, so we'll take a look at how to change that.
Start by going to frame number 0. The frame number is to the right of the End frame as shown in the image above. Next (making sure you have your curve selected) move your mouse over the option that says 'Evaluation Time', and press I on your keyboard. If you did it correctly, the box should now have turned yellow.
Now go to the frame where you want there to be a change in speed. In my case, it's frame number 30, where I want there to be a slight drop in speed as the camera is moving up. Type in that frame number, then type in the same number in the evaluation time box and press I again. For time's sake, I'm only going to do these frames, since I'm only giving a demonstration. Now split the window by clicking and dragging to the left the button shown below:
Change the window type to the Graph Editor by clicking the gray cube in the lower left corner of the new window, and selecting the option from the menu. You should see something like this in the center (you'll probably need to zoom out some to see all of it):
This is an animation curve; we can control the speed of the camera by editing it. Select the top orange handle by right clicking it, move it over to the right some (G - X), and that slows down the camera! The farther to the right you move the curve, the slower it gets, and the farther left, the faster it gets.
That's all for this tutorial; congrats on completing it! If you have any questions, comments, or problems, post them in the comments below. Thanks for reading, and as soon as I figure out how to solve the rotation problem, I'll make a post about it.
Wednesday, September 8, 2010
Creating a Roller Coaster in Blender 2.5 - Part 2 (Creating the Actual Ride)
In this part of the tutorial, I will be showing you how to extend the track and create all of the loops, twists, and turns that make a roller coaster a ride instead of just a flat track.
This is the finished result of this tutorial:

First, let's add a Path Curve (Shift A - Curve - Path). Now go into Edit Mode (Tab), and move the vertices over to the right a little bit (G - X - 2). Tab back into Object Mode, and select the roller coaster track piece (Right Click). Scale it down (S - 0.25), and click on the Modifiers button on the right.

Select 'Add Modifier' and choose 'Array' from the drop-down menu. Under 'Relative Offset' set the X value to 0, and the Z value to 1. You'll now notice that if you raise the 'Count' number, the track will get longer. This is what we want, but right now the mesh won't deform with the path curve. To fix this, add a Curve Modifier on your track. Under 'Object', type in the name of your curve (or click on the box, and select your curve from the drop-down menu). Your Modifier setup should now look like this:

Now if we select our path curve (Right Click the Curve), go into Edit Mode (Tab), right click one of the vertices to select it, and move it around (G), the track should follow it. You can mess around with it for a little while, but don't stretch it too far, or it will mess up the mesh.

Now modify your path Curve to create the track. Remember, Right Click to select, G to move, R to rotate, E to extrude. Don't just move it around in the top view (7); make sure you view it from the front (1) and side views (3) as well. Keep in mind that we're working with 3 dimensions, not 2. Once you're finished, simply raise the Count on the Array Modifier until you have enough track pieces on. You may need to resize the track pieces a little in order for them to fit well on the track.

And that's all for this part of the tutorial! Congrats on completing it, and I hope you'll read the rest of the series when the other parts come out. If you have any questions, comments, or problems, post them in the comments below. Thanks for reading!
This is the finished result of this tutorial:

First, let's add a Path Curve (Shift A - Curve - Path). Now go into Edit Mode (Tab), and move the vertices over to the right a little bit (G - X - 2). Tab back into Object Mode, and select the roller coaster track piece (Right Click). Scale it down (S - 0.25), and click on the Modifiers button on the right.
Select 'Add Modifier' and choose 'Array' from the drop-down menu. Under 'Relative Offset' set the X value to 0, and the Z value to 1. You'll now notice that if you raise the 'Count' number, the track will get longer. This is what we want, but right now the mesh won't deform with the path curve. To fix this, add a Curve Modifier on your track. Under 'Object', type in the name of your curve (or click on the box, and select your curve from the drop-down menu). Your Modifier setup should now look like this:

Now if we select our path curve (Right Click the Curve), go into Edit Mode (Tab), right click one of the vertices to select it, and move it around (G), the track should follow it. You can mess around with it for a little while, but don't stretch it too far, or it will mess up the mesh.

Now modify your path Curve to create the track. Remember, Right Click to select, G to move, R to rotate, E to extrude. Don't just move it around in the top view (7); make sure you view it from the front (1) and side views (3) as well. Keep in mind that we're working with 3 dimensions, not 2. Once you're finished, simply raise the Count on the Array Modifier until you have enough track pieces on. You may need to resize the track pieces a little in order for them to fit well on the track.

And that's all for this part of the tutorial! Congrats on completing it, and I hope you'll read the rest of the series when the other parts come out. If you have any questions, comments, or problems, post them in the comments below. Thanks for reading!
Sunday, September 5, 2010
Marshall Amplifier
Here's a Marshall Amp I've just finished. I may be doing a tutorial on it, but I don't know. I'd better finish the roller coaster tutorial series first anyway. :)

If you have any tips on improving it, I'm all ears!

If you have any tips on improving it, I'm all ears!
Saturday, September 4, 2010
Creating a Roller Coaster in Blender 2.5 - Part 1 (Modeling the Track)
Hello, everyone! Sorry it took a few days for me to get around to writing this, but here it is.
This is the final result of this tutorial:

Before reading this tutorial, be sure to deselect this button:

Start by deleting the default cube (X) and add a circle (Shift A - Circle), and on the left, change the number of vertices from 32 to 8. We need a lower poly count in order for the roller coaster to run up to speed in the viewport. Press 7 then 5 on your number pad to go into top orthographic view. With the circle selected, press R - Y - 90 to rotate it 90 degrees along the Y axis.
Scale it down (S - 0.25), and go into Edit Mode (Tab). Now extrude it 5 units along the X axis (E - X - 5). Press Ctrl + to select the rest of the tube and press Shift D to duplicate it, and now right click to prevent it from moving away from it's starting point. Now press G - Y - 1 to move it up along the Y axis. Now scale it down on the Y and Z axes (S - Shift X - 0.6).

Now duplicate it and move it the opposite direction (Shift D - Y - -2). Press B and drag a box around the tube on top to select it.

Press 1 on your number pad to go into front view, then move the selection up along the Z axis (G - Z - 0.5). Now we'll go back to top view (numpad 7), and we'll add some loop cuts to each tube (Ctrl R). It's up to you how many to add; the more you add the smoother your roller coaster will look, but the slower it will run in the viewport and the longer it will take to render. I'm going to add 3 loop cuts to each tube.

Go back into Object Mode (Tab) and on the panel on the left, select Smooth under 'Shading'. Now tab back into Edit Mode, select everything (A) and Press Ctrl N to recalculate the normals. Now duplicate (Shift D) the top tube (select it by pressing B and dragging a box around it). Rotate it along the Z axis 90 degrees (R - Z - 90) and move it along the Y axis (G - Y - -1). Now scale it down (S - 0.4).

Press G - X - -2 to move it along the X axis near the end. Duplicate this and move it along the X axis again (Shift D - X - 1). Repeat this duplicating and moving it until you have something like this:

Now go into side view (press 3 on your number pad), and select the middle loop by pressing B and dragging a box around it.

Move the selection down along the Z axis (G - Z - -0.5). Now deselect your current selection, and select the two loops around it. Now press G - Z - -0.3 to move it down along the Z axis again, but not as much. If you tab back into Object Mode now and rotate your view around some, you should see this:

Go back into top view (numpad 7), and let's give it a material now. On the right, click on the Materials button (the checkered ball) and add a new material. Under 'Diffuse' change the color to whatever color you want your roller coaster to be. I'll make mine blue.

Great job! You've completed this part of the Roller Coaster creation tutorial! In the next part, we'll be covering how to actually make the track longer and have all the twists, turns and drops that a roller coaster should have. If you have any questions, comments, or problems, post them in the comments below. Thanks for reading!
Thursday, September 2, 2010
Tutorial will be coming soon
I've been a bit delayed because of school; you can expect the roller coaster tutorial part 1 to be there before Monday.
Subscribe to:
Posts (Atom)